Unleash the Power of Using Categories in your WordPress Web Site
Written by Becky Bruso
In this post we will explore how to add categories and the way they are used in WordPress. This article will detail how to add categories in WordPress and will have a visual image of the process in action. I have also included a short desktop video which demonstrates exactly how to add and use categories. It includes audio instructions as well. I wrote and recorded both methods to provide you with the ability to pick which method is best for you to see how categories work. Categories are one of the best features of WordPress as they allow you to organize your information for your own use and for that of your web site visitors.A well-organized web site provides a positive experience for those visiting your web site by helping them to easily locate the information they have come to find. It can make the difference between someone staying on your site or clicking away in frustration.Let’s take a look at how to add and use categories.
Video Demonstration of Adding and Using WordPress Categories
Written Instructions on Adding and Using WordPress Categories
How to Add Categories in WordPress
To add a category, go to the WordPress Dashboard, click on Posts. Here you will see the dashboard menu selections expand to show categories. Click on Categories, simply type the name of your category in the box and save your changes by clicking on add new category. I don’t fill in the description here unless it is one which is intended for web visitors to see as well. I choose not to add a description and document it outside of WordPress since some themes show the category description on the front end of your web site. This may not be desirable for you to show this description to the world, unless you have created your category descriptions with your web site visitor’s needs in mind. I also do not add a specific name as a slug, unless I have defined a need to do so. One will automatically be assigned by WordPress anyway.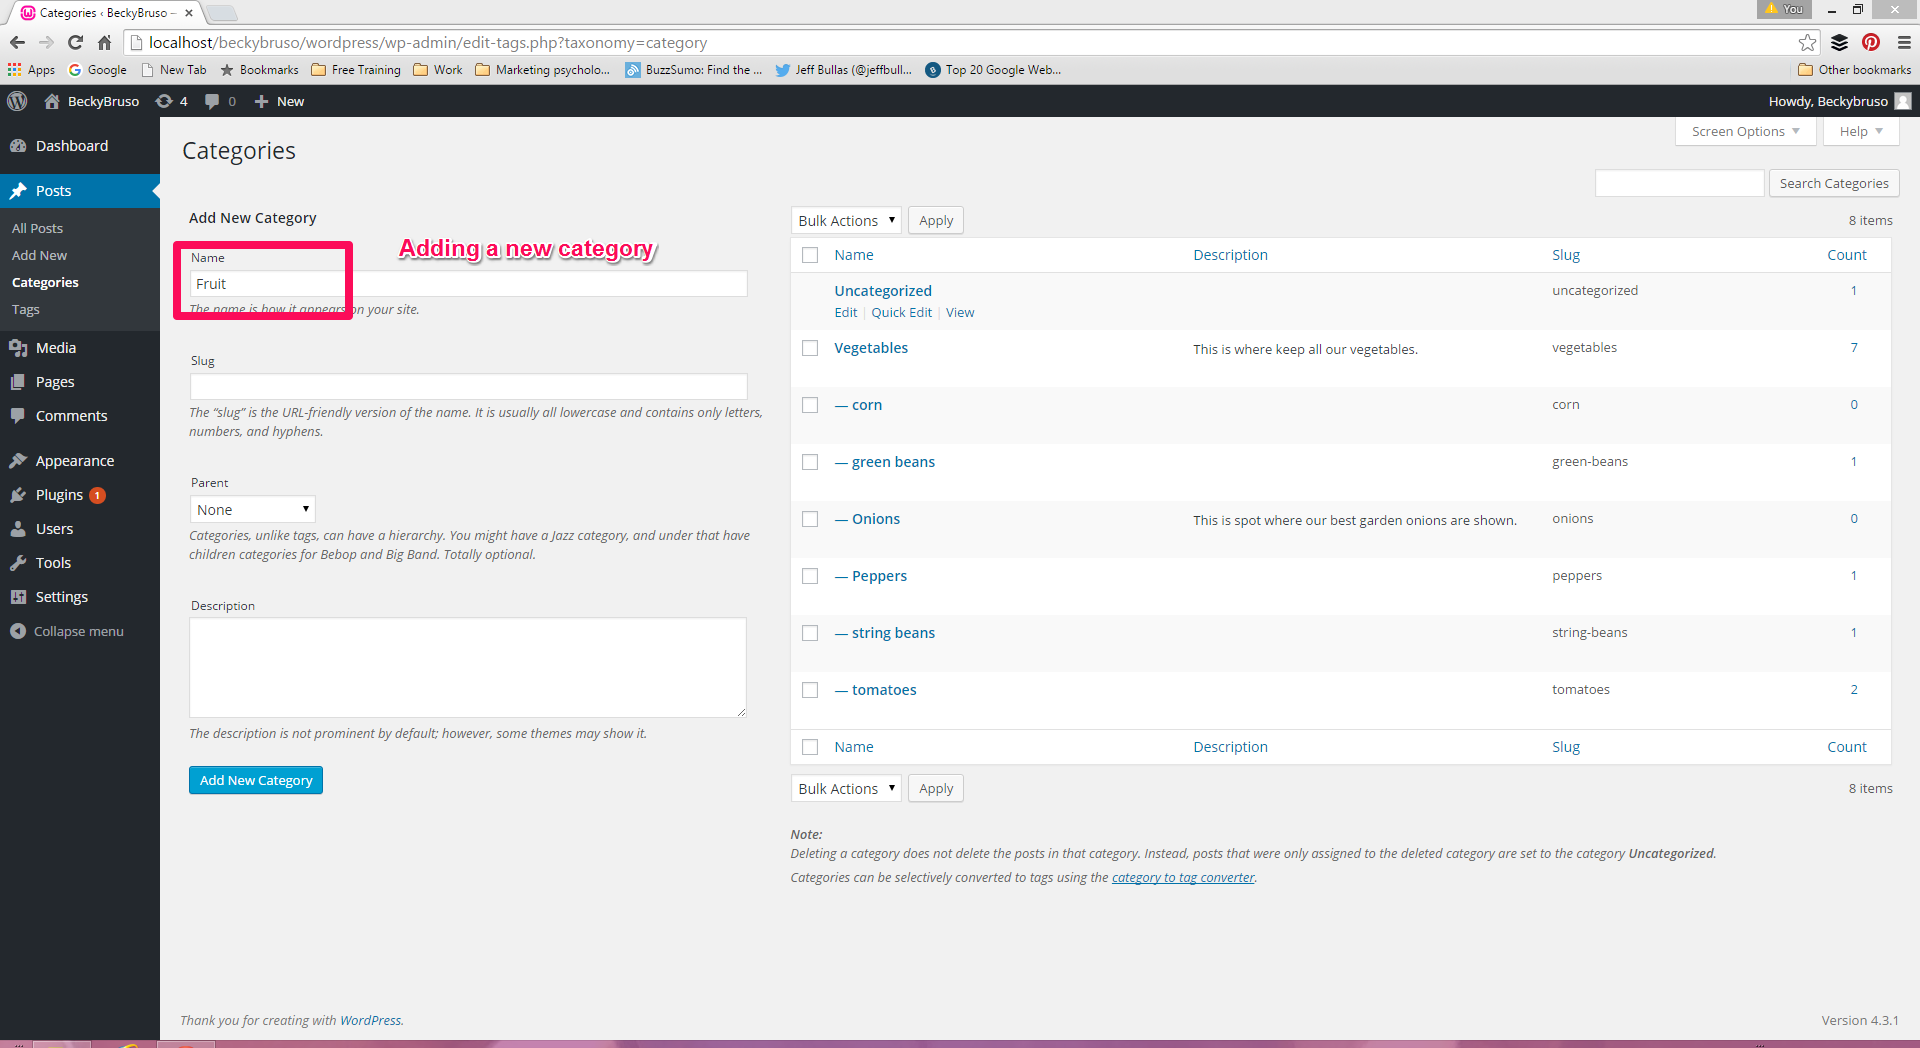
How to Assign a Category to a Post
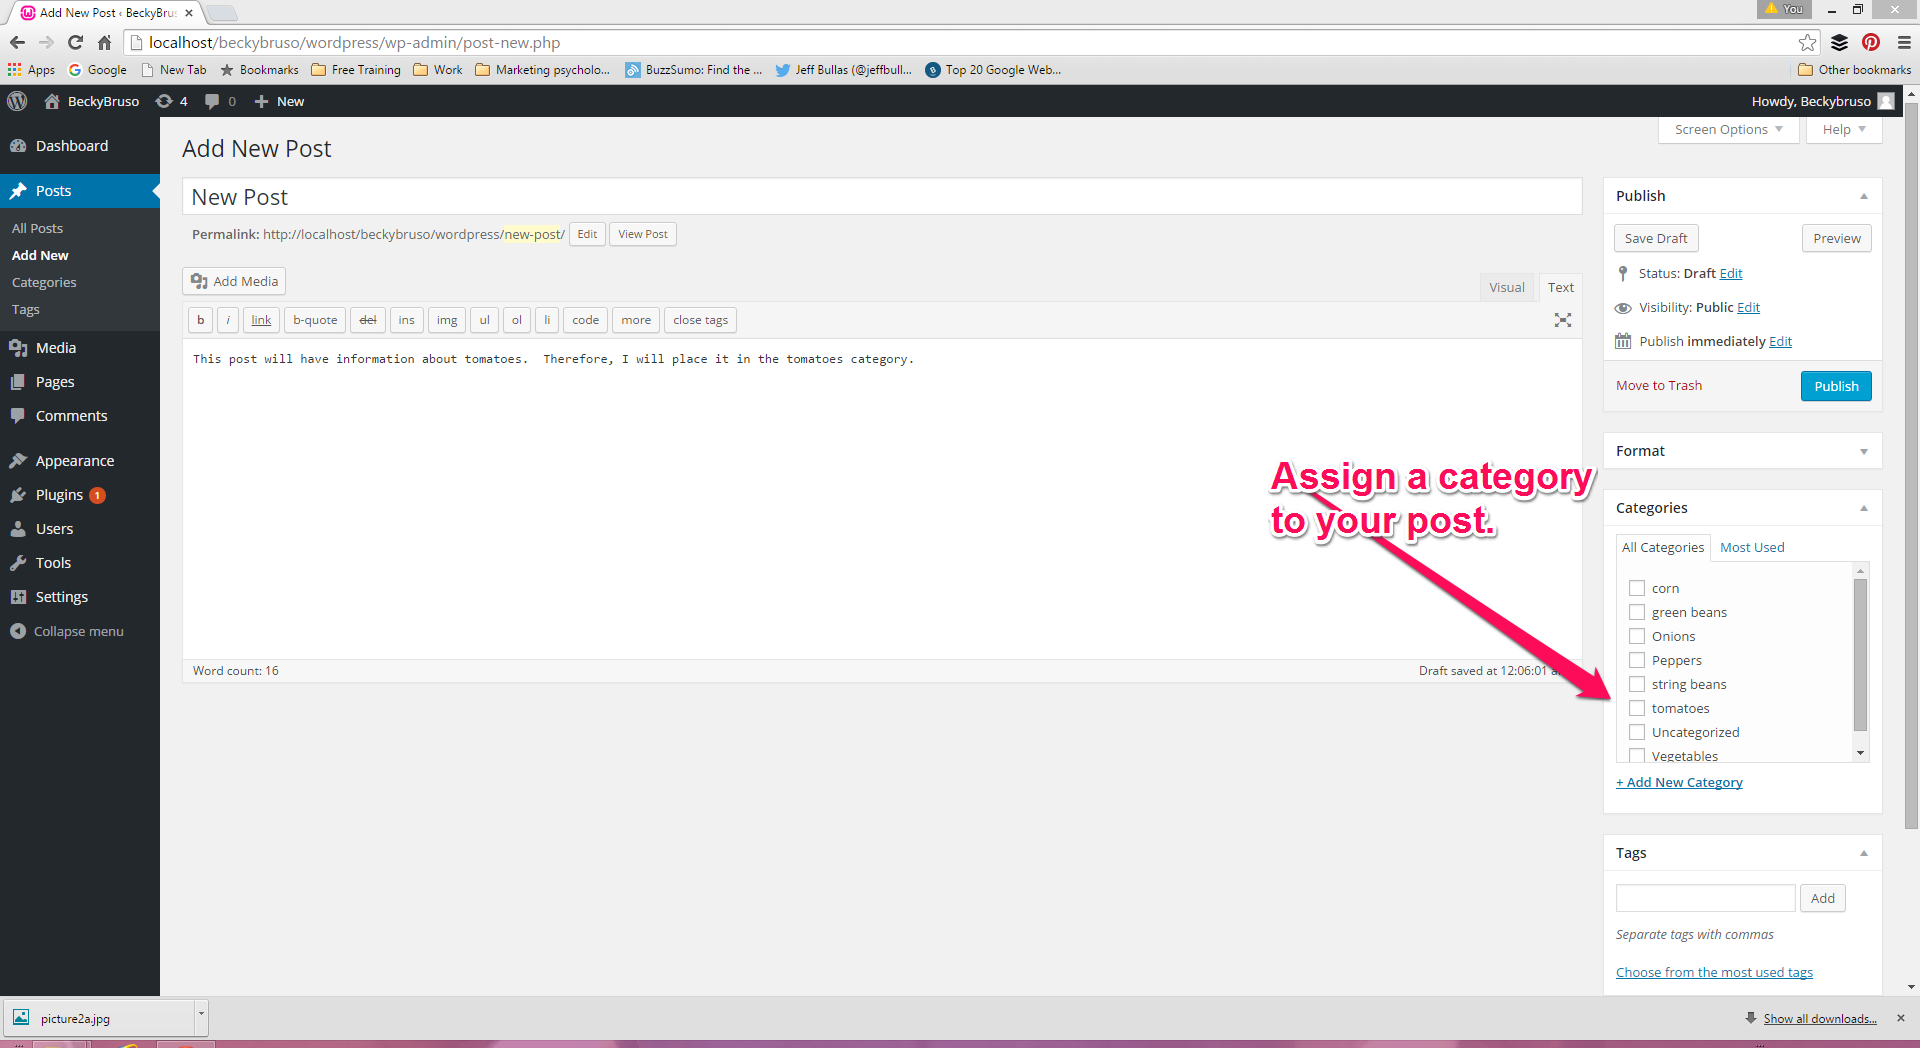
How to Set a Specific Category to Auto Assign in WordPress
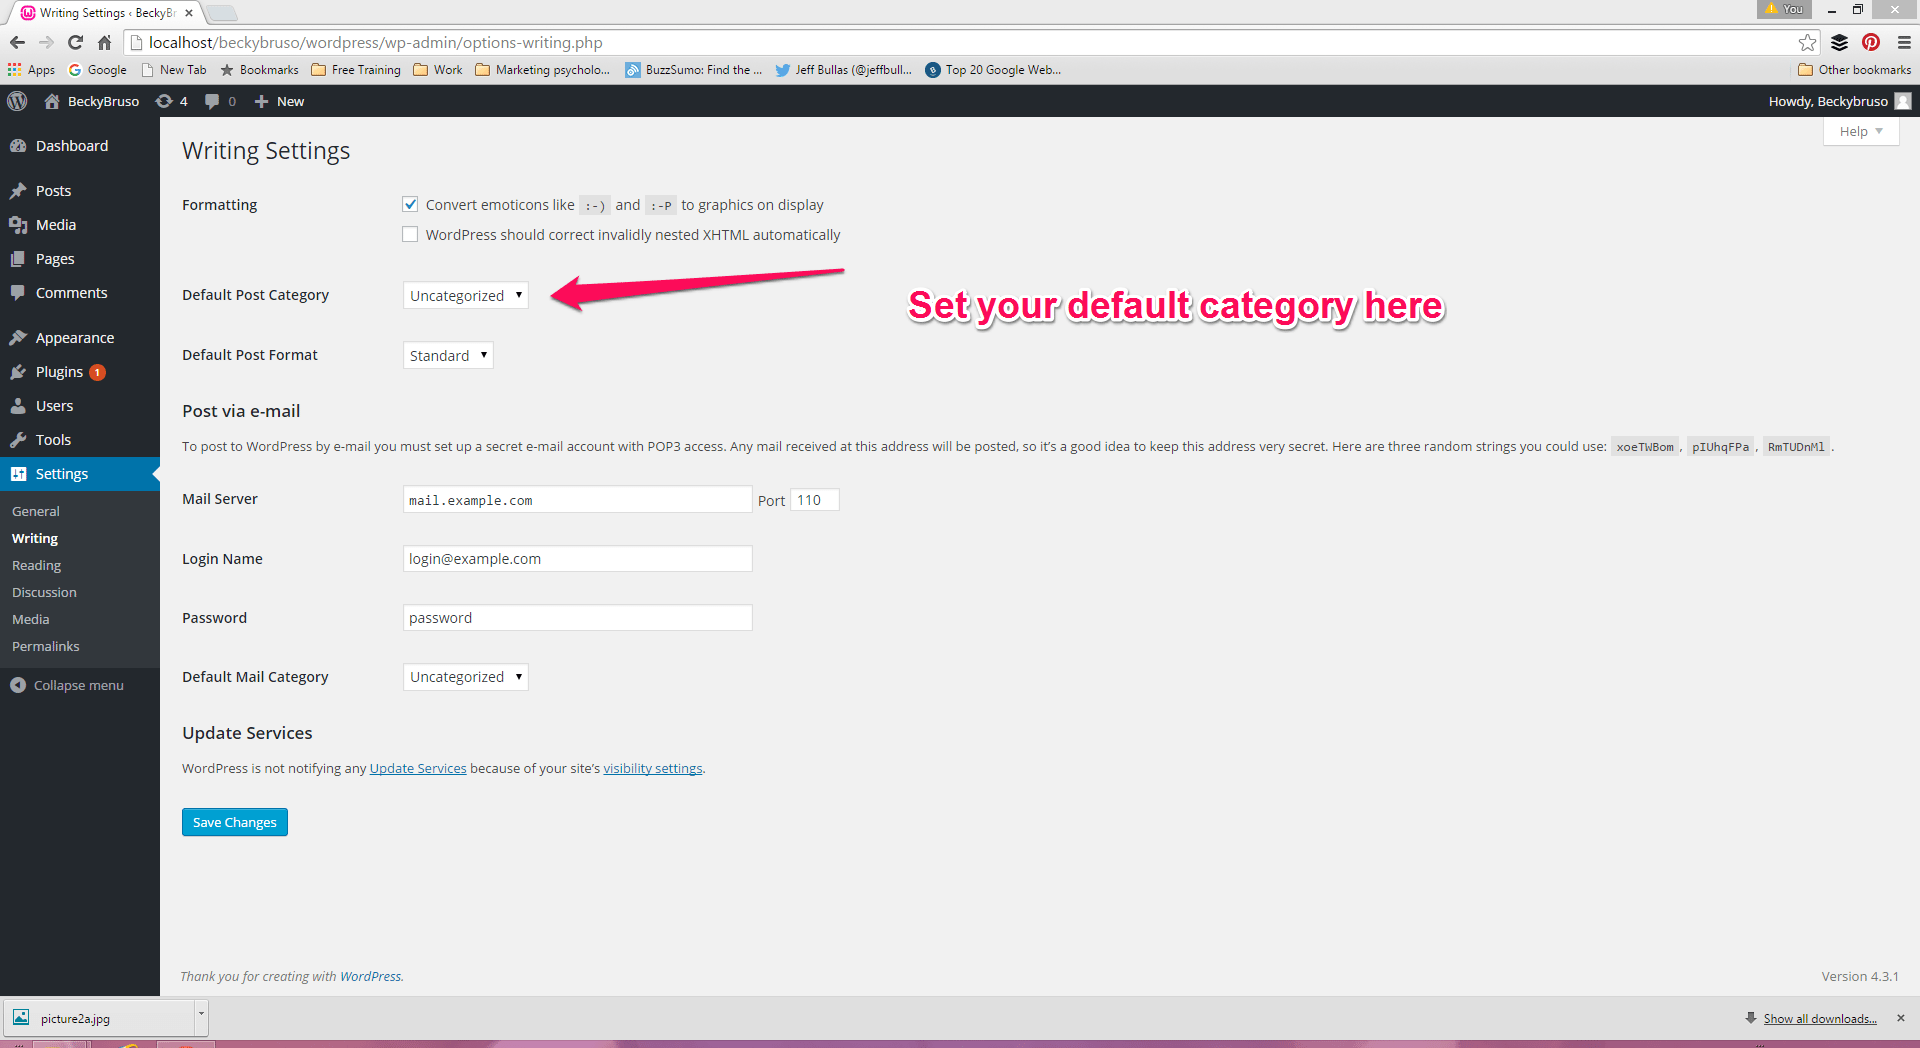
Suppose you always are writing about a specific topic and want to set it up so that WordPress will automatically use that category in your posts. There is a way you can set it and forget it by using the WordPress default category settings. In this case, you set up a default category so that your posts are automatically assigned to your preferred category when you begin to write.Default is computer speak for something that automatically happens without any need for you to take action.To set your default categories, go to Settings, Writings on your WordPress Dashboard. Locate the default category drop down box, then select your default category. A visual of this screen is shown below. Be sure to save your changes before exiting this screen.
How to Create a Parent-Child Category Relationship
Let’s assume that you have a category and sub-category relationship for some of the content on your web site. Within WordPress, you can create a parent category for sub-categories of information. To do this, you start by adding the category you wish to be the parent just as you would any other category. Begin by selecting Posts then Categories from your WordPress dashboard, then select add category. Next, you will need to edit each of the categories you wish to make children. To assign a parent, locate the drop down box with the parent title, and select the category you wish to have as the parent. The image below shows what the screen where this is done looks like.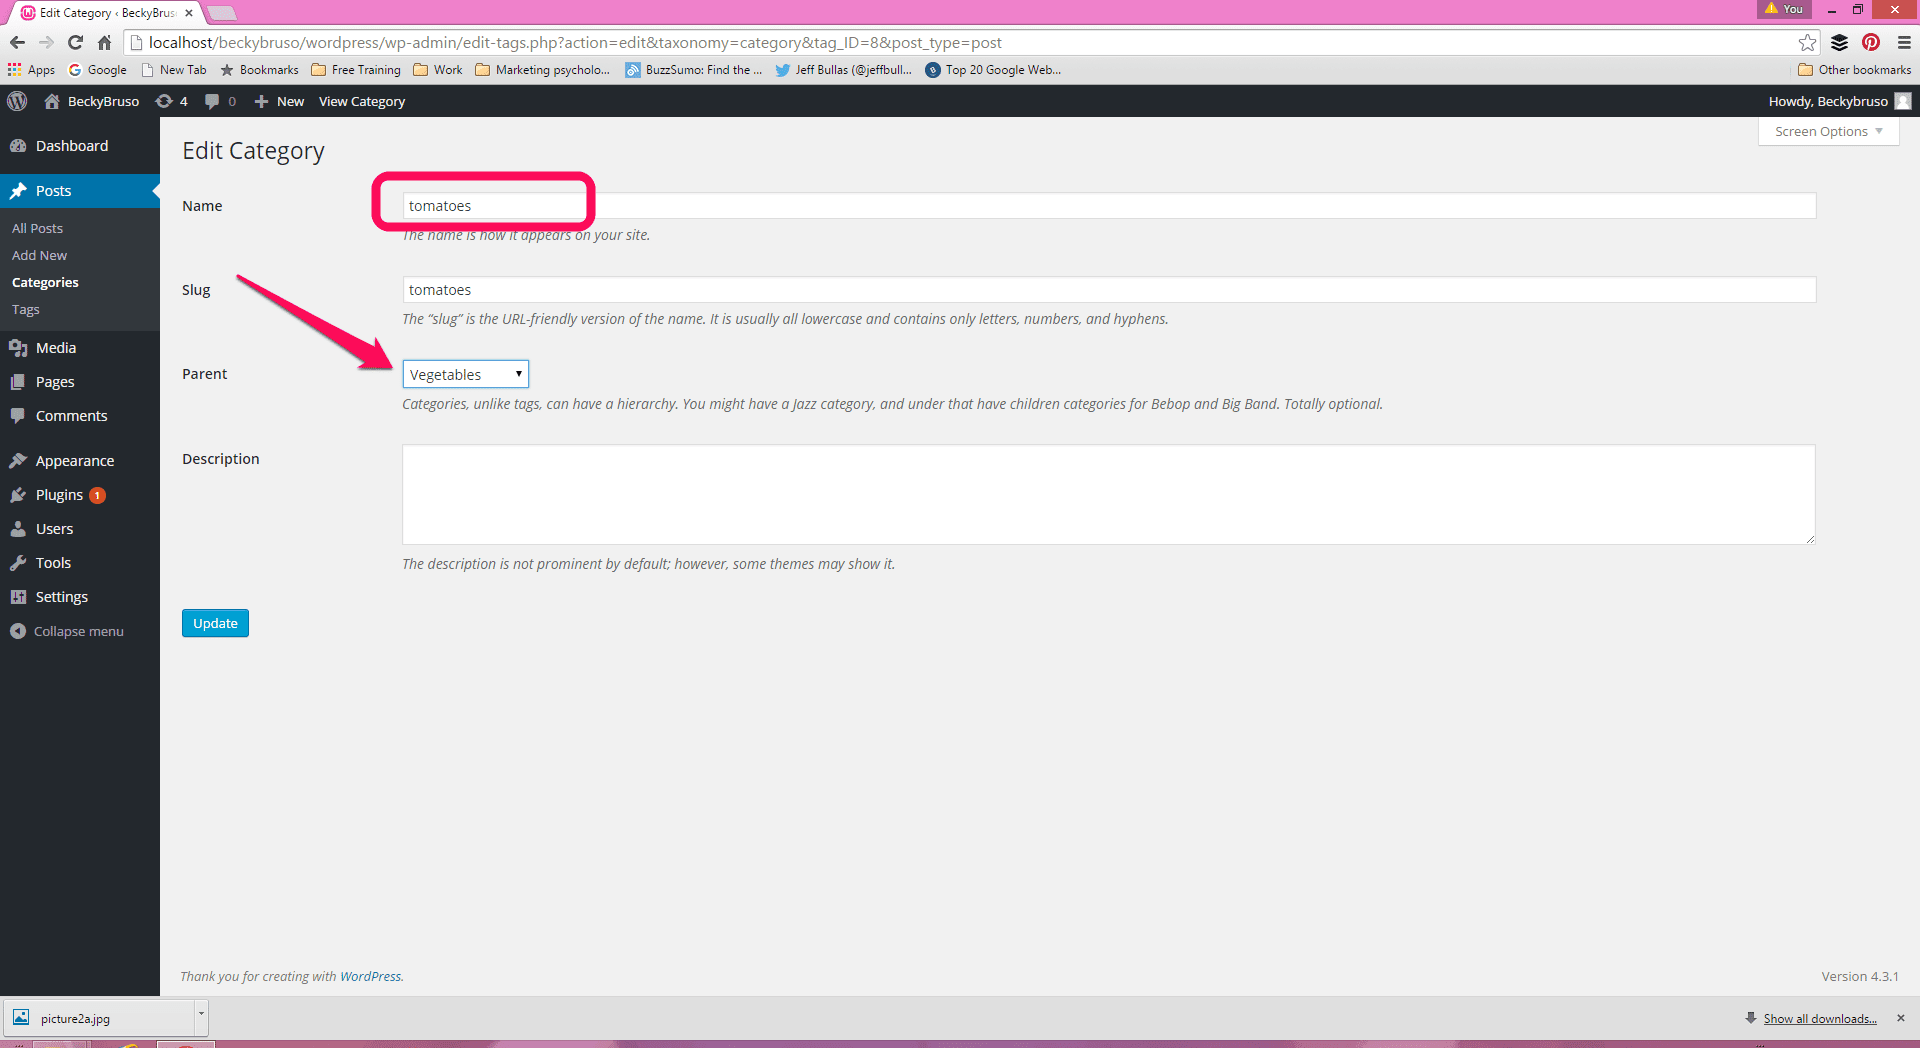
How to Add A Menu Item Based Upon A Category
Once you have added categories and created posts and labeled them with specific categories, you are able to use these categories as a menu item for the main navigation of your site. To add a category to your menu, go to the dashboard of your web site, pick Appearances, then Menus. Once under menus, you will see that you have options of pages, links, and categories to choose from as potential menu items. If you expand the downward triangle option next to categories, you will see a list of your most frequently used categories. If the category you want is not shown, click on the link to show all categories.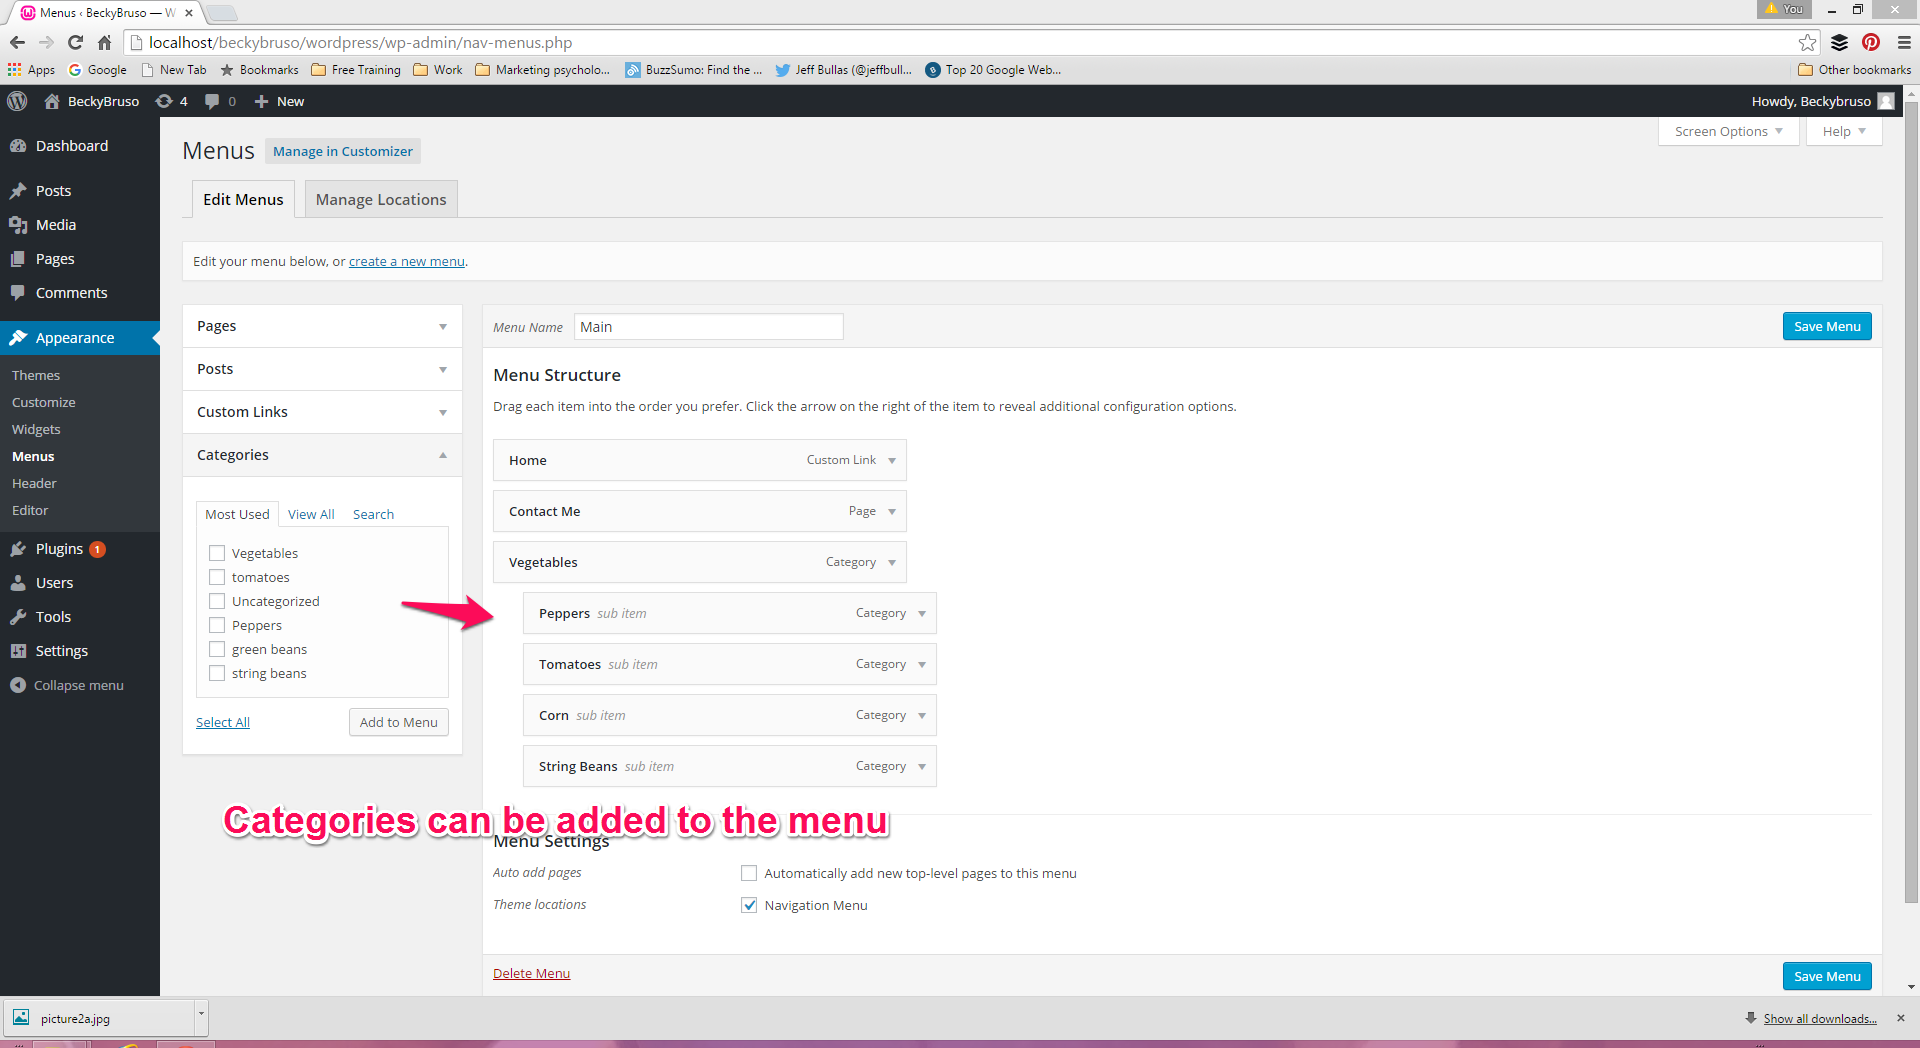
How to Add Category Lists to Sidebars and Footer and Widget Areas
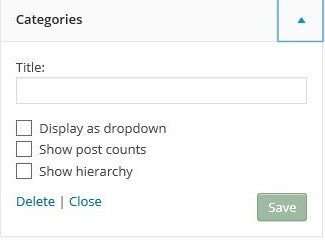
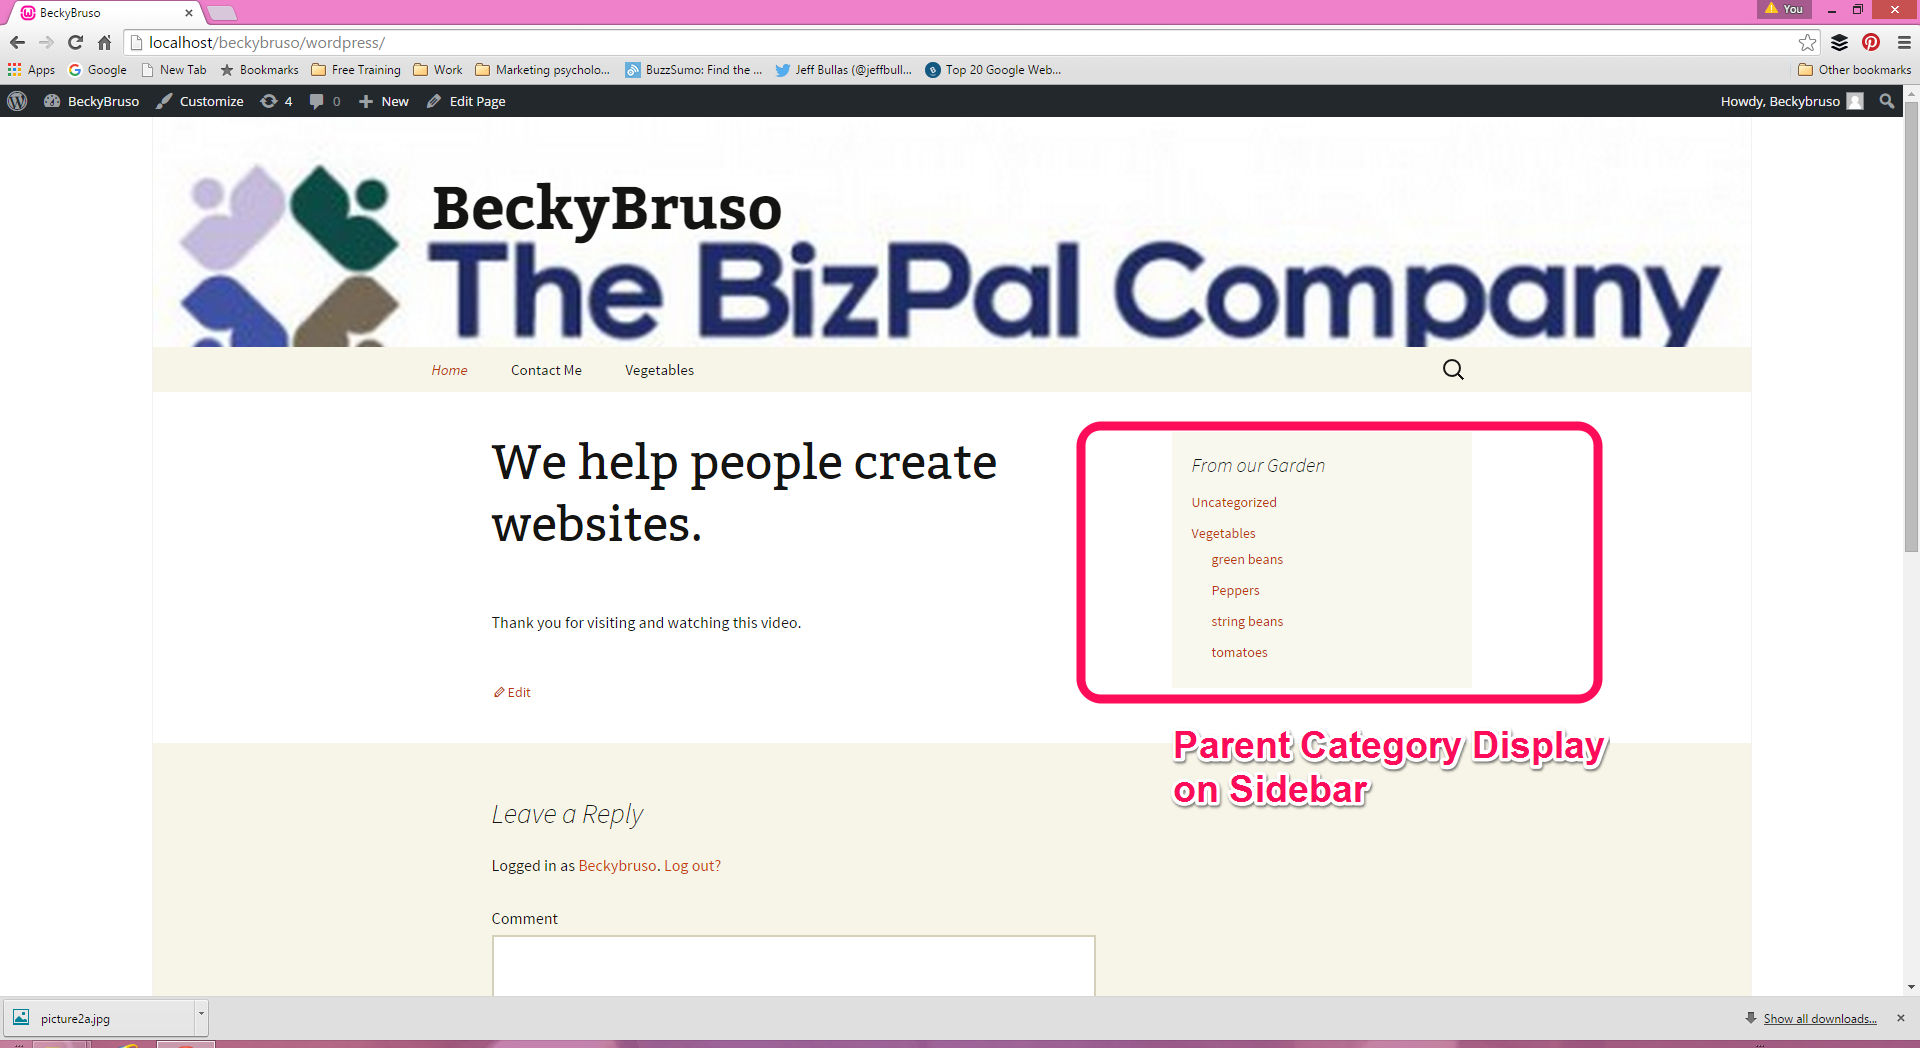
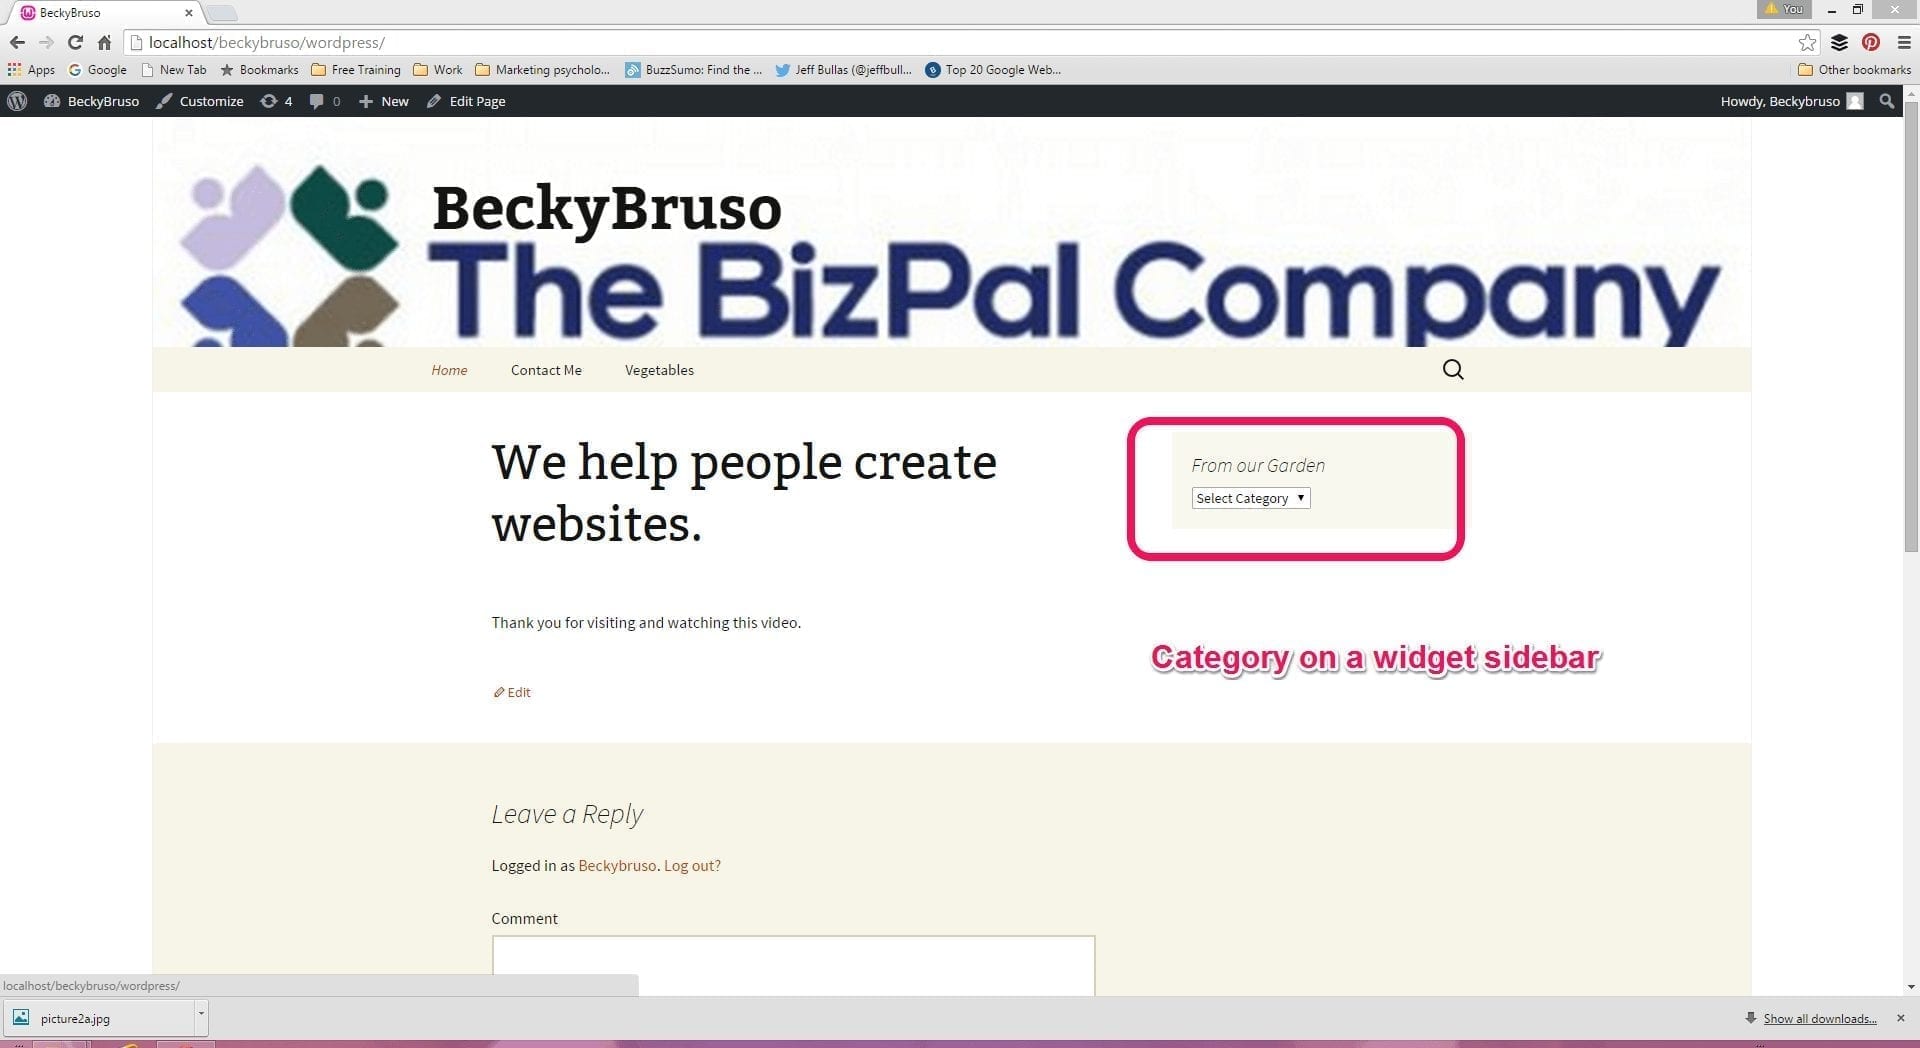
WordPress has some built-in features for categories. It allows you to add your categories to other screen areas of your web site with little more than a click and drag and drop. You also get the choice of how to display these. You can select from a traditional list format, hierarchical format, and/or drop down list box format.